Sunday, December 6, 2015
How to uninstall ns2 from Ubantu
Uninstall ns2 and
Step by step installation of ns-2.34 on ubuntu 14.04
Step by step installation of ns2. 34 on ubuntu 14.04
Download link:
http://sourceforge.net/projects/nsnam/files/allinone/ns-allinone-2.34/
$sudo apt-get update
$sudo apt-get install build-essential
Run
$tar -zxvf ns-allinone-2.34.tar.gz
#include <
$
$
$cd ns-allinone-2.34/ns-2.34
$sudo make install
$ns
It will show % sign
Run
$nam
$cd ns-allinone-2.34/nam-1.14
$sudo cp nam /usr/local/bin
$nam
Sunday, March 29, 2015
How to install Ubuntu-12.04 LTS on VMware Workstation 9
How to install Ubuntu-12.04 LTS on VMware Workstation 9
Saturday, March 28, 2015
How to Install NS-2.35 in Ubuntu-13.10 / 14.04 (in 4 easy steps)
Step 1: Setting up the Prerequisites
1. First of all, download Network Simulator (NS-2.35) from here.I assume you have downloaded it into your '/home/user_name/Documents' directory.
2. Now we have to update the Ubuntu with its latest components. Open up a terminal and run these commands:
| 1 | sudo apt-get update |
| 2 | sudo apt-get dist-upgrade |
| 3 | sudo apt-get update |
Make sure that your Ubuntu is fully updated ( i.e. there should be no pending updates in your Ubuntu Software Center and in Software Updater).
3. Before installing the NS we have to install some essential packages required by the NS. So run the following commands:
| 1 | sudo apt-get install build-essential autoconf automake |
| 2 | sudo apt-get install tcl8.5-dev tk8.5-dev |
| 3 | sudo apt-get install perl xgraph libxt-dev libx11-dev libxmu-dev |
Step 2: Extract and Install NS
1. Extract the downloaded NS package either using the right click context menu "Extract here" or using the following commands from a terminal:
| 1 | cd /home/user_name/Documents |
| 2 | tar -xvzf ns-allinone-2.35.tar.gz |
2. After extracting the "ns-allinone-2.35" folder, open up the file "/ns-allinone-2.35/ns-2.35/linkstate/ls.h" in an editor. You can do it either from the terminal or from the file explorer (Nautilus). We have to make some changes in the ls.h file else it will show an error while installing the NS. Once you have opened the file move to the line 137 and replace the erase (image 1) with this—>erase (image 2) and save the file.
 |
| Image 1. Replace erase. |
 |
| Image 2. With this—>erase. |
NOTE: If you don't make the above stated change then you will see an error while installing the NS (image 3).
 |
| Image 3. Error (Please Follow the Previous Step). |
3. Now its time to finally install the NS. Open up a terminal and move to the directory where you have extracted the package, in our case its '/home/user_name/Documents' and install NS using the following commands (image 4):
| 1 | cd /home/user_name/Documents/ns-allinone-2.35 |
| 2 | ./install |
It will take around 15 minutes so have patience.
 |
| Image 4. Installation in Progress. |
Step 3: Set the Environment Variables
1. Assuming everything went well in the previous step and you have successfully installed your NS. Now that NS is installed, there are some environment variables that need to be added to your profile. This can be done by editing the .bashrc file. Open a new terminal and open the file using:
| 1 | sudo gedit .bashrc |
NOTE: You may want to create a backup of the .bashrc before editing, the easiest way is to copy the file to a different location. Later you can replace the edited .bashrc with the copied one in case something goes sideways or if you want to remove the NS.
2. Add the following lines AT THE END of the file. Be sure to change "/path_to" to the path of where you have extracted the NS (e.g. '/home/user_name/Documents').
| # LD_LIBRARY_PATH |
| OTCL_LIB=/path_to/ns-allinone-2.35/otcl-1.14/ |
| NS2_LIB=/path_to/ns-allinone-2.35/lib/ |
| USR_Local_LIB=/usr/local/lib/ |
| export LD_LIBRARY_PATH=$LD_LIBRARY_PATH:$OTCL_LIB:$NS2_LIB:$USR_Local_LIB |
| # TCL_LIBRARY |
| TCL_LIB=/path_to/ns-allinone-2.35/tcl8.5.10/library/ |
| USR_LIB=/usr/lib/ |
| export TCL_LIBRARY=$TCL_LIBRARY:$TCL_LIB:$USR_LIB |
| # PATH |
| XGRAPH=/path_to/ns-allinone-2.35/xgraph-12.2/:/path_to/ns-allinone-2.35/bin/:/path_to/ns-allinone-2.35/tcl8.5.10/unix/:/path_to/ns-allinone-2.35/tk8.5.10/unix/ |
| NS=/path_to/ns-allinone-2.35/ns-2.35/ |
| NAM=/path_to/ns-allinone-2.35/nam-1.15/ |
| export PATH=$PATH:$XGRAPH:$NS:$NAM |
Save the file and restart the system, alternatively you can just reload the .bashrc as:
| 1 | source ~/.bashrc |
Step 4: Validate the Installation
You need to validate NS to check if everything is OK but keep in mind that it will take a lot of time (about 1:30 hrs). Open up a terminal and move to the directory ‘/home/user_name/Documents/ns-allinone-2.35/ns-2.35/' and run:
| 1 | ./validate |
And That is it ! You can now run ns from a terminal window by executing: ns
If you received the "%" sign, it means that NS is running (image 5). Congratulations !!
 |
| Image 5. Installation Successful. |
* Uninstalling the NS
If you want to remove the NS from your system then follow these steps:
| 1 | Delete the directory 'ns-allinone-2.35'. |
| 2 | Delete the ns related files from '/user/local/bin'. |
| 3 | Edit the '.bashrc file' and remove the paths that you have added during the installation. |
| 4 | Restart the system and run following commands one by one: |
| 5 | sudo apt-get autoremove |
| 6 | sudo apt-get clean |
P.S.
Many people are getting the following error when they run the ns after the installation:
 |
| Image 6. Error: 'ns' is currently not installed. |
If you get this error then kindly ensure that you have set the path (as in step 3) correctly and try restarting the system. If the error persists then try running the ns from '/ns-allinone-2.35/ns-2.35/bin/'.
You can start working on NS now, the standard Marc Greis' tutorial on NS can be found here. Another tutorial is 'NS by example' by Jae Chung and Marc Claypool, and is available here.
Have Fun !!
Monday, March 23, 2015
Installing ns-2.35 in Fedora 21
Installing Ns2.35 in Fadora 21
This post will tell you how to install ns-2.35 in Fedora 21 64 bit OS…..
Step 1: Install all the necessary packages
$] sudo yum update
$] sudo yum install tcl tk gcc-c++ libX11-devel libXt-devel libXmu-devel
Step 2: unzip the software ns-xx.tar.gz
$] tar zxvf ns-allinone-2.35.tar.gz
$] cd ns-allinone-2.35/
Open the file
$] gedit ns-2.35/linkstate/ls.hin line number 137 change erase to this->erase as shown above…..
Save the file and give this command
$] ./install This will install all the packages as you see in the video. This process may be take upto 5 minutes.
Once installation is over now….
Setting the PATH
The following line is pasted in the PATH variable as shown in the video
$] gedit /home/pradeepkumar/.bash_profile
The following line is pasted in the PATH variable as shown in the video
$] gedit /home/pradeepkumar/.bash_profile
:/home/pradeepkumar/ns-allinone-2.35/bin:/home/pradeepkumar/ns-allinone-2.35/tcl8.5.10/unix:/home/pradeepkumar/ns-allinone-2.35/tk8.5.10/unixOnce the PATH is set, source the .bash_profile file as the new PATH will be reflected within the current terminal.
the command is
$] source /home/pradeepkumar/.bash_profile
now try
$ ns
$ nam
$ xgraphto see whether the software is working or not.
the command is
$] source /home/pradeepkumar/.bash_profile
now try
$ ns
$ nam
$ xgraphto see whether the software is working or not.
How to install NS2.35 in Ubuntu 14.04
How to Install Ns2.35 in ubantu 14.04
This post tells you how to install ns-2.35 in ubuntu 14.04 64 bit Operating system.
This post tells you how to install ns-2.35 in ubuntu 14.04 64 bit Operating system.
his post also posts a video that shows the installation instructions.
1. There is no audio in this video, please bear with me but these texts will make you understand how the installation is done in linux.
2. Copy the source file into the home folder
/home/pradeepkumar/ns-allinone-2.35.tar.gz3. give this command to untar or unzip the software
tar zxvf ns-allinone-2.35.tar.gz
cd ns-allinone-2.35/
./installThis command will take some time to get ns2 installed….
Before step 1, give these commands (These commands will install the developmental libraries like C, C++, Tcl, Tk, etc)
sudo apt-get update
sudo apt-get install build-essential autoconf automake libxmu-dev
You may get an error in the ~ns-2.35/linkstate/ls.h file about a small correction in the C++ constructor
change a function erase to this->erase and then try ./install
This is the only error you can experience when installing ns2.35 under any of the OS (Fedora, Ubuntu or Linux Mint)
All your developmental libraries are available in the ns-allinone-2.35/ns-2.35/ folder only (There may be other folders that you do not need at all, all your recompilation, examples, protocols, agents, packets, etc will be under the folder ~ns-2.35/)
Once the installation is over, you need to set the path to make ns and nam works from any terminal…..
To set the path, here are the files
in ubuntu – /home/pradeepkumar/.bashrc
in Linux Mint – /home/pradeepkumar/.profile
in Fedora – /home/pradeepkumar/.bash_profile
So i need to set the path in the file .bashrc (Which will be available in the home folder of my machine)
Now installation is over…. now to set the path
Once the path is set, you need to check whether ns and nam are working. type ns and nam and see whether they are giving any results.
they are not working, as the PATH what we set is not yet sourced
one method is logout and login back or else
try giving this command
they are not working, as the PATH what we set is not yet sourced
one method is logout and login back or else
try giving this command
source /home/pradeepkumar/.bashrc (you should not get any errors, if you get then there may be something wrong in the path setting)
!!!!!!!!!!!!!Installation success!!!!!!
!!!!!!!!!!!!!Installation success!!!!!!
INSTALLING NS-2.35 ON UBUNTU 13.04

Here are the steps for installing ns-2.35 on Ubuntu 13.04 and before versions.
Open Terminal and …
[Step 1] Install some Essential Libraries and Softwares:
sudo apt-get install tcl8.5-dev tk8.5-dev
sudo apt-get install gcc-4.4 g++-4.4
sudo apt-get install build-essential autoconf automake
sudo apt-get install perl xgraph libxt-dev libx11-dev libxmu-dev
[Step 2] Download ns-2.35
Download ns-2.35 from http://sourceforge.net/projects/nsnam/files/latest/download
Unpack ns2 to your Desktop directory tar -zxvf ns-allinone-2.35.tar.gz -C /home/khawajaali/Desktop
(or simply unzip the package on your desktop)
[Step 3] Modify the OTcl makefile
Open /home/khawajaali/Desktop/ns-allinone-2.35/otcl-1.14/Makefile.in
Change CC = @CC@ to CC=gcc-4.4
Save the file
[Step 4] Install ns2
cd /home/khawajaali/Desktop/ns-allinone-2.35
./install
(this will take a while)
[Step 5] Modify ~/.bashrc
Once the installation is successful (without any errors), we need to add the path information to the file ~/.bashrc
gedit ~/.bashrc
Now Add these lines in the end of the file
#LD_LIBRARY_PATH
OTCL_LIB=/home/khawajaali/Desktop/ns-allinone-2.35/otcl-1.14
NS2_LIB=/home/khawajaali/Desktop/ns-allinone-2.35/lib
X11_LIB=/usr/X11R6/lib
USR_LOCAL_LIB=/usr/local/lib
export LD_LIBRARY_PATH=$LD_LIBRARY_PATH:$OTCL_LIB:$NS2_LIB:$X11_LIB:$USR_LOCAL_LIB
# TCL_LIBRARY
TCL_LIB=/home/khawajaali/Desktop/ns-allinone-2.35/tcl8.5.10/library
USR_LIB=/usr/lib
export TCL_LIBRARY=$TCL_LIB:$USR_LIB
# PATH
XGRAPH=/home/khawajaali/Desktop/ns-allinone-2.35/bin:/home/khawajaali/Desktop/ns-allinone-2.35/tcl8.5.10/unix:/home/khawajaali/Desktop/ns-allinone-2.35/tk8.5.10/unix
# Note: the above two lines starting from XGRAPH should come in the same line
NS=/home/khawajaali/Desktop/ns-allinone-2.35/ns-2.35/
NAM=/home/khawajaali/Desktop/ns-allinone-2.34/nam-1.15/
PATH=$PATH:$XGRAPH:$NS:$NAM
Save the modification and close the file
source ~/.bashrc
And that is all *cheers*
Now type ns to see % and type nam to show the nam startup window, This shows the installation has been successful.
Important : you should replace /home/khawajaali/Desktop with the path to your Desktop folder.
Still unable to complete the installation ? Post your issues in the comment section below
How to install ns2 on fedora 14
How to Install ns2 in fadora 14
Another Method
Another Method
This tutorial has been tested on Ns-2 version 2.30, 2.31 and 2.32 and on Fedora 6, 7 and 8 (both 32 and 64bit).
Pre step: Fedora intallation & configuration
For a tutorial on how to install Fedora click here.
For some tips and tricks click here, but this page isn't updated for Fedora 6 so you could check this too.
1 step: package dependencies
Open a bash shell (click here to watch how) and type at prompt:
su
yum install gcc-c++
yum install libX11-devel
yum install xorg-x11-proto-devel
yum install libXt-devel
yum install gcc-c++
yum install libX11-devel
yum install xorg-x11-proto-devel
yum install libXt-devel
and for nam installation (optional):
yum install libXmu-devel
2 step: tcl installation
Open the bash shell and type at prompt:
su
cd
wget http://prdownloads.sourceforge.net/tcl/tcl8.4.14-src.tar.gz
cd /usr/share/
tar -zxvf /root/tcl8.4.14-src.tar.gz
cd /usr/share/tcl8.4.14/unix/
./configure
make
make install
rm -f /root/tcl8.4.14-src.tar.gz
cd
wget http://prdownloads.sourceforge.net/tcl/tcl8.4.14-src.tar.gz
cd /usr/share/
tar -zxvf /root/tcl8.4.14-src.tar.gz
cd /usr/share/tcl8.4.14/unix/
./configure
make
make install
rm -f /root/tcl8.4.14-src.tar.gz
3 step: tk installation
Open the bash shell and type at prompt:
su
cd
wget http://prdownloads.sourceforge.net/tcl/tk8.4.14-src.tar.gz
cd /usr/share/
tar -zxvf /root/tk8.4.14-src.tar.gz
cd /usr/share/tk8.4.14/unix/
./configure
make
make install
rm -f /root/tk8.4.14-src.tar.gz
cd
wget http://prdownloads.sourceforge.net/tcl/tk8.4.14-src.tar.gz
cd /usr/share/
tar -zxvf /root/tk8.4.14-src.tar.gz
cd /usr/share/tk8.4.14/unix/
./configure
make
make install
rm -f /root/tk8.4.14-src.tar.gz
4 step: otcl installation
Open the bash shell and type at prompt:
su
cd
wget http://downloads.sourceforge.net/otcl-tclcl/otcl-src-1.12.tar.gz
cd /usr/share
tar -zxvf /root/otcl-src-1.12.tar.gz
cd /usr/share/otcl-1.12/
./configure --with-tcl=/usr/share/tcl8.4.14/
make
kwrite Makefile
cd
wget http://downloads.sourceforge.net/otcl-tclcl/otcl-src-1.12.tar.gz
cd /usr/share
tar -zxvf /root/otcl-src-1.12.tar.gz
cd /usr/share/otcl-1.12/
./configure --with-tcl=/usr/share/tcl8.4.14/
make
kwrite Makefile
you should see the krite application window (click here to watxh); then find the line 31 or near
INST_OLIBSH= NONE/lib
and modify as
INST_OLIBSH= /usr/local/lib
then save the file, close kwrite anf finish the installation typing at prompt:
make install
rm -f /root/otcl-src-1.12.tar.gz
rm -f /root/otcl-src-1.12.tar.gz
5 step: tclcl installation
Open the bash shell and type at prompt:
su
cd
wget http://downloads.sourceforge.net/otcl-tclcl/tclcl-src-1.18.tar.gz
cd /usr/share
tar -zxvf /root/tclcl-src-1.18.tar.gz
cd /usr/share/tclcl-1.18/
./configure --with-tcl=/usr/share/tcl8.4.14/
make
make install
rm -f /root/tclcl-src-1.18.tar.gz
cd
wget http://downloads.sourceforge.net/otcl-tclcl/tclcl-src-1.18.tar.gz
cd /usr/share
tar -zxvf /root/tclcl-src-1.18.tar.gz
cd /usr/share/tclcl-1.18/
./configure --with-tcl=/usr/share/tcl8.4.14/
make
make install
rm -f /root/tclcl-src-1.18.tar.gz
6 step: ns2 installation
Open the bash shell and type at prompt:
su
cd
wget http://downloads.sourceforge.net/nsnam/ns-src-2.30.tar.gz
cd /usr/share
tar -zxvf /root/ns-src-2.30.tar.gz
cd /usr/share/ns-2.30/
./configure (or ./configure --enable-debug if you want to use gdb for debugging)
make
make install
echo 'export LD_LIBRARY_PATH=$LD_LIBRARY_PATH:/usr/local/lib:' > /etc/profile.d/ns.sh
chmod 0733 /etc/profile.d/ns.sh
echo 'export LD_LIBRARY_PATH=$LD_LIBRARY_PATH:/usr/local/lib:' > $HOME/.bashrc
rm -f /root/ns-src-2.30.tar.gz
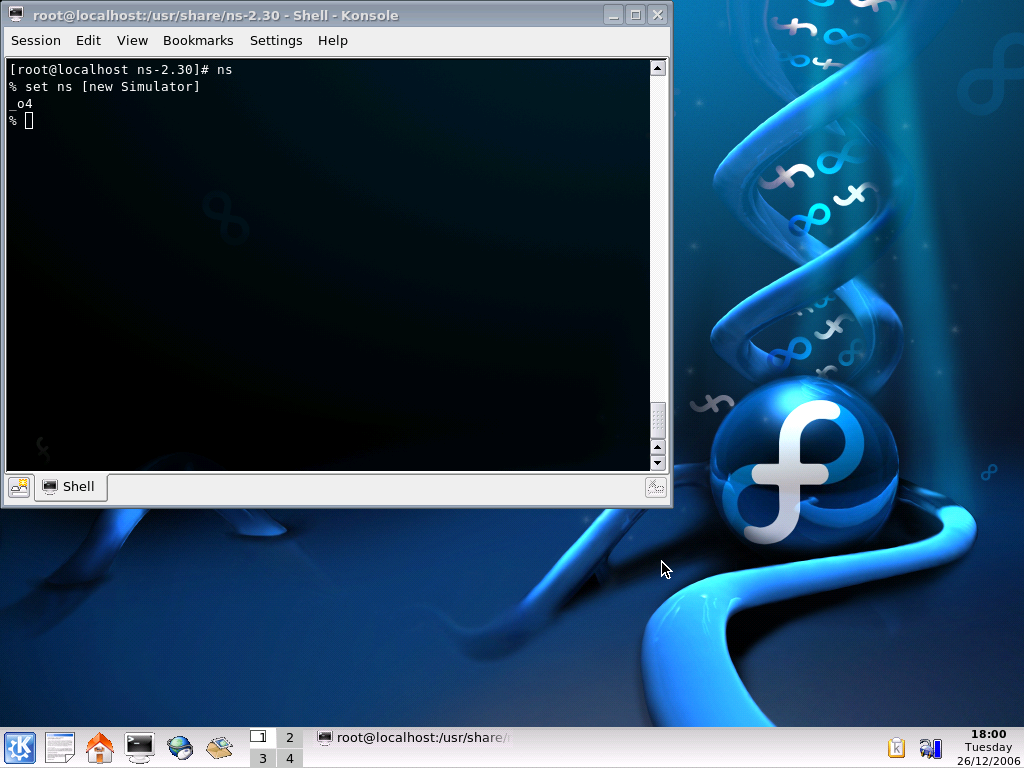
To check if ns2 is well installed, type at promp (after a reeboot):
ns
you should see the '%' simbol, and if you type at the prompt:
% set ns [new Simulator]
you should see something like '_ox' or '_oxx', where x and xx are numbers (click here to watch). To return at promtp, type control and c keys togheter.
7 step: nam installation (optional)
Open the bash shell and type at prompt:
su
cd
wget http://downloads.sourceforge.net/nsnam/nam-src-1.12.tar.gz
cd /usr/share
tar -zxvf /root/nam-src-1.12.tar.gz
cd /usr/share/nam-1.12/
./configure
make
make install
rm -f /root/nam-src-1.12.tar.gz
cd
wget http://downloads.sourceforge.net/nsnam/nam-src-1.12.tar.gz
cd /usr/share
tar -zxvf /root/nam-src-1.12.tar.gz
cd /usr/share/nam-1.12/
./configure
make
make install
rm -f /root/nam-src-1.12.tar.gz
To check if nam is well installed, type at promp:
nam
you should see the nam window (click here to watch)
otherwise, if you read this message:
'nam: no display name and no $DISPLAY environment variable'
it means that you're tring to launch nam out of a X11 graphical session.
8 step: xgraph installation (optional)
Open the bash shell and type at prompt:
su
cd
wget http://downloads.sourceforge.net/nsnam/xgraph-12.1.tar.gz
cd /usr/share
tar -zxvf /root/xgraph-12.1.tar.gz
cd /usr/share/xgraph-12.1/
./configure
make
make install
rm -f /root/xgraph-12.1.tar.gz
cd
wget http://downloads.sourceforge.net/nsnam/xgraph-12.1.tar.gz
cd /usr/share
tar -zxvf /root/xgraph-12.1.tar.gz
cd /usr/share/xgraph-12.1/
./configure
make
make install
rm -f /root/xgraph-12.1.tar.gz
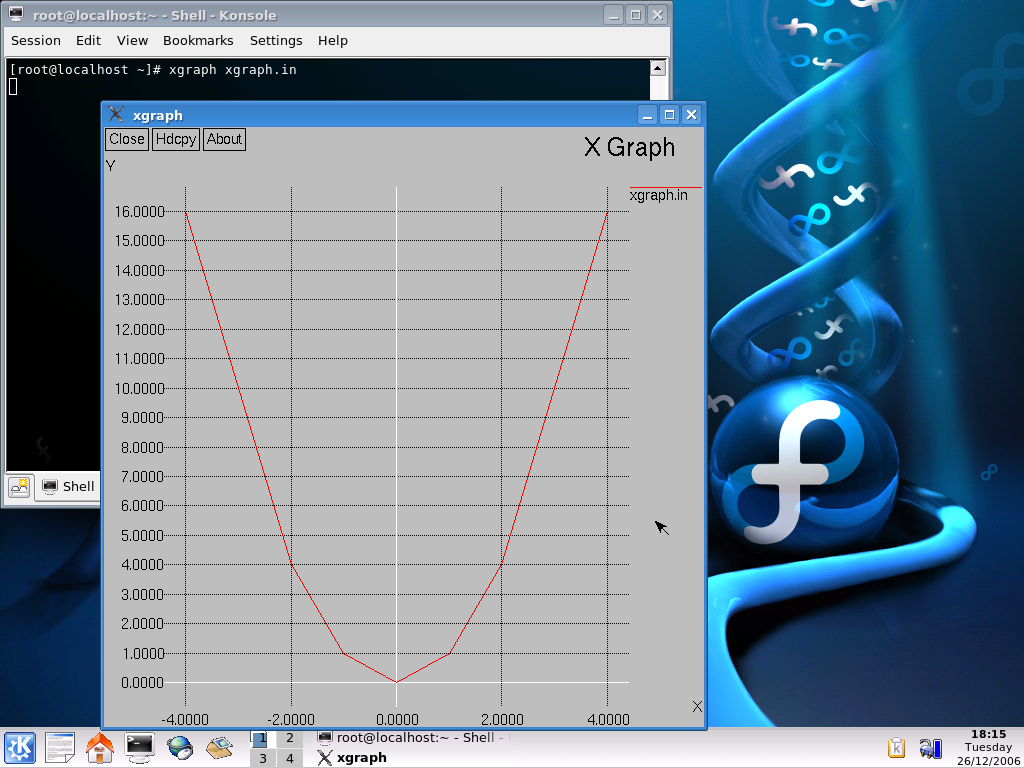
To check if xgraph is well installed, type at promp:
cd
wget http://wpage.unina.it/marcello.caleffi/file/xgraph.in
xgraph xgraph.in
wget http://wpage.unina.it/marcello.caleffi/file/xgraph.in
xgraph xgraph.in
you should see the xgraph window (click here to watch)
otherwise, if you read this message:
xgraph: cannot open display `'
it means that you're tring to launch xgraph out of a X11 graphical session.
How to install ns2.35 in linux mint 14
Instalation of NS 2.35 on Linux Mint 14
If You want to Install 2.34 on Linux Mint go on Below Link
CLICK HERE
If You want to Install 2.34 on Linux Mint go on Below Link
CLICK HERE
Sunday, March 22, 2015
How to Install NS-2 in Ubantu 10.04
Step # 1
Install Ubuntu 10.04 in oracle virtual box.Step # 2
By default root user account password is not set. Set root password by login through user created during installation time for example ‘geeks’. Open up the terminal and set new root password by executing the following command$ sudo passwd rootNow logoff from geeks user and now login to the machine by root user in Gnome.
Step # 3
Now logoff from geeks user and relogin through root user in Gnome. Then Download the latest edition of NS2 source code, but first make sure your internet is working on your newly created virtual machine.Direct Download link
You can also download by executing the following command. But it is good practice to isolate ns2 work environment. First create ns2 directory in /root directory
# mkdir ns2

# cd ns2
This command will download the ns-allinone-2.35.tar.gz
# wget http://downloads.sourceforge.net/project/nsnam/allinone/ns-allinone-2.35/ns-allinone-2.35.tar.gzStep # 4
Since this is compressed archive we will have to decompress it. You can decompress it by double clicking it or by following command# tar –xzf ns-allinone-2.35.tar.gzStep # 5
Now install the following software required. First update the Ubuntu software repository.
# apt-get update

# apt-get install autoconf

# apt-get install libc6-dev g++ gcc

# apt-get install build-essential

# apt-get install libx11-dev

# apt-get install x-dev

# apt-get install xorg-dev

# apt-get install xgraph

# apt-get install gnuplot
Step # 6
Now enter /root/ns2/ns-allinone-2.35 directory and execute the install script
# cd /root/ns2/ns-allinone-2.35

# ./install
Step # 7
On successful installation please export the following paths in /root/.bashrc file. Start gedit and open /root/.bashrc file. Add the following 5 lines at the end of the file.
export
PATH=$PATH:/root/ns2/ns-allinone-2.35/bin:/root/ns2/ns-allinone-2.35/tcl8.5.10/unix/:/root/ns2/ns-allinone-2.35/tk8.5.10/unix/

export LD_LIBRARY_PATH=$LD_LIBRARY_PATH:/root/ns2/ns-allinone-2.35/otcl-1.14/:/root/ns2/ns-allinone-2.35/lib

export TCL_LIBRARY=/root/ns2/ns-allinone-2.35/tcl8.5.10/library/:/root/ns2/ns-allinone-2.35/tk8.5.10/library/

export NS=/root/ns2/ns-allinone-2.35/ns-2.35

export NSVER=2.35
Step # 8
Then logoff from root user and relogin and execute type ns at the terminal for checking. Also download the sample script and check it.
# wget http://nile.wpi.edu/NS/Example/ns-simple.tcl

# ns ns-simple.tclMonday, February 2, 2015
INSTALLING NS3 IN UBUNTU 14.04
1. ubuntu is installed run following command opening your terminal( ctrl+alt+T).
3. (now make sure you have not run sudo su to be superuser )
Downloading NS-3( ns -3 version 3.19 not 3.13)
cd
mkdir ns3
cd ns3
wget http://www.nsnam.org/release/ns-allinone-3.19.tar.bz2
tar xjf ns-allinone-3.19.tar.bz2
cd ns -allinone-3.19/
ls
4. . py along with other files.Then to build the examples in ns-3 run
. /build . py --enable-examples --enable-tests
If the build is successful then it will give output
"Build finished successfully". (clap for yourself)
5. Now run the following command to configure with waf ( build tool)
. /waf -d debug --enable-examples --enable-tests configure
To build with waf ( optional)
. /waf
6. allright
. /test . py
If the tests are ok the installation is done. :)
Subscribe to:
Posts (Atom)